Login
Login
Great Britain and the Middle East

Share

- Details
- Text
- Audio
- Downloads
- Extra Reading
British interest in Egypt, still nominally part of the Ottoman Empire, became intense during the 1880s, with the acquisition of direct control over the Suez Canal. Late in the nineteenth century, she competed with Germany for influence in the Persian Gulf and with Russia in Persia, whilst her success in the First World War enabled her influence to include Mesopotamia, which she divided with France. This lecture looked at the reasons for British interest in the Middle East, and at the limited duration and strength of her influence.
Download Text

GREAT BRITAIN AND THE MIDDLE EAST
Professor Kathleen Burk
Great Britain’s ‘moment in the Middle East’ [Monroe] was substantially about protection: protection of the route to India, protection of the route to oil, after 1945 ‘helping to hold the Soviet gateway to Africa’ [Monroe] and, finally, protection of her claim to be a world power. Her intention was not formal control but formal influence, the desired outcome of which was a series of friendly buffer states. However, the threat of other imperial powers, particular France and Russia, and then Germany, encouraged Britain to extend and exercise this control. Her serious involvement began in 1875, with the purchase of 44% of the shares in the Suez Canal Company, and ended in 1956, with the débâcle of the Suez crisis. There was a sort of long, withdrawing roar, as Britain withdrew from East of Suez during the period 1968 to 1971: the desire to remain had gone.
To place the importance of India in the British Empire, I need only note that as of 1910, roughly half of the British Army was stationed in India, whilst the Indian Army itself numbered a quarter of a million men, largely officered by the British, and with a huge resevoir of manpower at its back; it was the imperial army and police force. As a military training ground, India had every sort of climate and terrain. In economic terms, by 1913 India accounted for nearly ten percent of British trade and was by far the UK’s most important customer. The Government of India was virtually sovereign in its territory, making policy on its own - including foreign policy - without needing to refer back to London. PICTURE 2: MAP OF THE MIDDLE EAST IN THE 19TH CENTURY - During the nineteenth century, it had forged south Asia into a single unit for defence purposes by means of annexations, alliances and influence, and by the end of the nineteenth century its sphere of influence extended into the Middle East, including Cyprus, Aden, and the Arab principalities along the coast of Arabia.
Britain always preferred the ocean route to India to the two possible land routes; one was overland from Alexandria to Suez and thence via the Red Sea, whilst the other was across the north Syrian desert and down the Euphrates River to the Persian Gulf. There were two reasons for this: the ocean route was actually cheaper, and it was free from interference by bandits. Although there had been canals connecting the Nile delta and the Red Sea built intermittently from the 13th century B.C., in Great Britain the idea of a canal from the Mediterranean Sea to the Gulf of Suez was viewed as unrealistic.
PICTURE 3: FERDINAND DE LESSEPS AS A YOUNG MAN DREAMING - The builder of the Canal, the Frenchman Ferdinand de Lesseps, was not an engineer, but a former diplomat. As a young man his imagination had been caught by Napoleon’s dream of a canal across the isthmus connecting the Mediterranean with the Red Sea. PICTURE 4: DE LESSEPS AS A DIPLOMAT - Whilst French consul at Cairo in the 1830s, he became friends with Prince Said of Egypt; in 1854 Said came to the throne of Egypt, and De Lesseps, who had retired from the Foreign Service, hastened to Egypt to put his proposal before his old friend. Within two months the two had come to an agreement to build a canal from Port Said to Suez. PICTURE 5: PICTURE OF THE CANAL BEING BUILT - It took nearly fifteen years for the building of the canal, but on 17 November 1869 Empress Eugenie of France presided over its opening.PICTURE 6: CONTEMPORARY PRINT OF THE CANAL. PICTURE 7: PICTURE OF THE FIRST VESSELS THROUGH THE CANAL - this picture shows the first vessels through the canal. Indeed, the very first vessel through after the Empress Eugenie’s own yacht was the British P & O linerDelta. Various cartoons celebrated De Lesseps’ achievement, one of which is this of PICTURE 8: DE LESSEPS AS TARZAN.
The canal was not immediately a financial success, and by 1871 de Lesseps, on the verge of bankruptcy, was trying to sell the canal to one of the European powers, but the Ottoman Empire, one of whose provinces was Egypt, vetoed every suggestion. PICTURE 9: WILLIAM GLADSTONE - The government headed by William Gladstone had shown no interest at all in the canal, PICTURE 10: BENJAMIN DISRAELI - but the succession of Benjamin Disraeli as prime minister in February 1874 brought an imperialist to power. Disraeli had a realistic view of the strategic importance of Egypt and the canal, and when the opportunity arose in October 1875 of securing a large block of shares in the canal, Disraeli moved. It had to be done secretly, because had the French known what was being contemplated, they would have tried to buy the shares themselves - and, indeed, the day after Britain had secured it, they tried. But where was the money to come from? He couldn’t turn to Parliament: the Liberals were anti-imperialist, and would have tried to block it; he couldn’t have turned to the Bank of England, not least because they could not have provided the sum needed without deranging the market. So: he turned to the Rothschilds. PICTURE 11: LIONEL ROTHSCHILD, LATER LORD ROTHSCHILD - The story, as told by Montagu Corry, Disraeli’s Principal Private Secretary, goes like this: ‘Disraeli had arranged with him [Corry] that he should be in attendance... just outside the Cabinet room and, when his chief put out his head and said ‘Yes,’ should take immediate action. On this signal being given he went off to New Court and told Rothschild in confidence that the Prime Minister wanted £4,000,000 “tomorrow”. Rothschild... picked up a muscatel grape, ate it, threw out the skin, and said deliberately, “What is your security?” “The British Government.” “You shall have it.”’ According to the Rothschild historian, this is partly fantasy, since Disraeli had, in all probability, already discussed the matter with him. [ Ferguson ] It was hardly a small sum: it was equivalent to over 8% of the entire UK budget (net of debt charges).
PICTURE 12: COL. ORABI PASHA - This is a picture of Ahmed Orabi Pasha. Within seven years, the Liberals under Gladstone, now the Prime Minister, had to decide just how important the Canal was to the Empire. Rulers who are in the pocket of foreigners lose the respect of their subjects, and Egyptian discontent with their ruler and with the inept Turkish ruling élite stimulated a violent nationalist reaction. PICTURE 13: ORABI PASHA LEADING THE REBELLION - The Orabi Rebellion of September 1881, a military revolt led by Col. Orabi Pasha and his three fellow colonels, who were the only four native Egyptian colonels in the army, had as its slogan ‘ Egypt for the Egyptians’. The revolt was against the Turkish Khedive Taufik, but also against all foreign influence, and was supported by élite groups, intellectuals, and the rural population, who joined with the army in demanding a constitution. Riots in Alexandria in June 1882 between Europeans fearing massacre and Egyptians fearing occupation resulted in the deaths of 50 Europeans and 170 Egyptians. The revolt raised British fears for the security of the Canal and worries amongst Europeans that the nationalists might cancel repayment of the huge national debt.
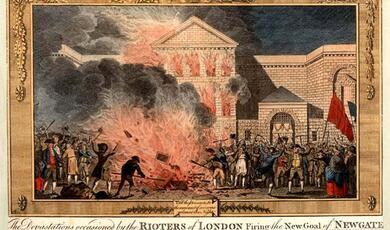
PICTURE 14: MAP OF EGYPT - The British Mediterranean fleet shelled Alexandria and British troops took it on 12 July. With the backing of the Khedive, British troops under Sir Garnet Wolseley landed at Ismailia on 16 August, occupied the Suez Canal, and marched towards the Sweetwater Canal’s Kassassin Lock, where they fought and routed the Egyptian Army. The Egyptians retreated to entrenchments at Tel-el-Kebir, about sixty-five miles north of Cairo, threatening to blow up the Canal and cancel Egypt’s foreign debt. PICTURE 15: BATTLE OF TEL-EL-KEBIR - They were followed by the British, who engaged them in battle just before daybreak on 13 September. The battle lasted for about half an hour, and the Egyptians then fled. The British marched to Cairo, where they took Orabi prisoner, most of his army having deserted after Tel-el-Kebir. The British were now in control. Army and Naval Intelligence were keen to maintain their grip: they were becoming more and more convinced that the security of Imperial routes required direct control, and the addition of a naval base at Alexandria, when added to those at Cyprus and Malta, would considerably strengthen Britain’s regional position. There were also economic benefits foreseen: Egyptian long-staple cotton for Lancashire mills, markets for British exports, and opportunities for investments. There was also the familiar British conviction that the Egyptians were unable to run their country effectively, and thus it would be a kindness to remain and do it for them. Thus British advisers were gradually placed in all government departments to guide the Egyptian ministers. Khedive Taufik accepted British rule to safeguard his throne, and appointed a series of Cabinet ministers likely to defer to British advice. Those ministers who disagreed with the advisers on what were designated ‘important questions’ were forced to resign. The Egyptian army was temporarily disbanded, and then refashioned under British officers, and British forces, paid for by the Egyptians, were permanently stationed in the country. PICTURE 16: EVELYN BARING, FIRST LORD CROMER - ‘This system, whereby Egyptians supposedly ruled their own country, but were manipulated by British advisers responsible to no one save [the British Agent and Consul-General Evelyn] Baring [later Lord Cromer], came to be known as the “Veiled Protectorate”.’ [Al-Sayyid-Marsot]
As the nineteenth century drew to a close, Great Britain’s position was subject to increasingly threatening pressure from other powers. The Franco-Russian Treaty of 1894, although directed against Germany, brought together in alliance Britain’s two imperial rivals; the Boer War of 1899-1902 revealed profound military deficiencies and weaknesses; and the concession given by the Ottoman Sultan to Germany in 1903 for a railway from Berlin to Baghdad threatened the British sphere of influence in the Persian Gulf and the nearby principalities. To consolidate her power and eliminate these threats as far as possible, Great Britain came to agreements with her imperial rivals to settle most outstanding Middle Eastern conflicts. The Anglo-French Agreement of 1904 recognised the predominant positions of Britain in Egypt and of France in Algeria and Morocco, whilst the Anglo-Russian Agreement of 1907 split Persia between the two powers. These agreements also facilitated the alliance of the three powers during the First World War.
PICTURE 17: OTTOMAN EMPIRE - For a century, threats against India had been parried in part by a policy of keeping the Ottoman Empire together, PICTURE 18: MAP OF 19TH CENTURY MIDDLE EAST and using Turkish Arabia, Persia and Afghanistan as a shield against Russia. These were countries which Great Britain did not herself want to occupy, but which she could not afford to have occupied by her enemies. However, with the entry of the Turks into the First World War as an ally of the Germans, the British approach to the Middle East changed, because Turkish Arabia now became enemy territory, whilst the road to the others lay open to subversive agents. Because there was fear of German influence on the Turkish Army, and fear of its proximity to the Canal, the Eastern Mediterranean needed to be secured. Military reinforcements were sent to Egypt, and on 18 December 1914, it was declared a protectorate. Cyprus, a leasehold since 1878, was annexed on the day that Britain went to war with Turkey.
But there was also a new thrust, and this was into Mesopotamia. The pressure for this had two main sources, the Government of India and the Admiralty. The former wanted to prevent eastward penetration by German agents, and to preserve the friendly sheiks of Kuwait and the Persian Gulf from Turkish pressure or attack. The concern of the Admiralty was oil, since 25,000 tons a month were being exported from new oilfields in Persia. In early October an expedition was sent to secure the head of the Persian Gulf. By the end of November, Britain was in occupation of the port of Basra. The policy in Mesopotamia was confused, with London wanting a cautious strategy of protecting oilfields near Basra, and the Government of India favouring a more aggressive approach.PICTURE 19: SIR JOHN NIXON - With the appointment of Sir John Nixon, an aggressive commander in the Indian Army, as Commander-in-Chief of British forces in Mesopotamia in April 1915, a new forward policy was signalled. Nixon had a great contempt for the quality of Turkish forces and a singular lack of concern that his own troops be provided with suitable and adequate equipment, transport and medical facilities. Following some early easy successes, he became convinced, against the advice of his field commander, General Sir Charles Townsend, that his small force could advance to Baghdad with little difficulty; in October 1915, Townsend was ordered by Nixon to take Baghdad. PICTURE 20: KUT-EL-AMARA - However, he suffered reverses, and was forced to retreat to Kut-al-Amara, where from December he was besieged by the Turks. A British relief force was repulsed, and Townsend surrendered in humiliation in April 1916. PICTURE 21: GENERAL SIR FREDERICK MAUDE - London then replaced Nixon with its own choice of commander, and General Sir Frederick Maude took over the command. PICTURE 22: BRITISH TROOPS ENTER BAGHDAD - In March of the following year, the British took Baghdad.
PICTURE 23: SIR ARCHIBALD MURRAY - In January 1916, Sir Archibald Murray was sent out to take command of the Egyptian Expeditionary Force. He reorganised the British forces in the region, and then led an advance to the Sinai desert. However, he failed twice to capture Gaza,PICTURE 24: OF GENERAL SIR EDMUND ALLENBY - and was replaced in June 1917 by General Sir Edmund Allenby, a soldier of great vigour and imagination. He won the Third Battle of Gaza, the gateway to Palestine, in early November, and then continued towards Jerusalem, where the British forces defeated the Turks at Junction Station in mid-November. PICTURE 25: CAPTURE OF JERUSALEM 9 DECEMBER 1917 - Jerusalem itself was captured on 9 December. On entering Jerusalem at noon on 11 December, Allenby, the 34th conqueror of Jerusalem, dismounted and, together with his officers and some foreign diplomats and military attachés, entered the city on foot through the Jaffa Gate out of respect for the status of Jerusalem as the Holy City of Christians, Jews, and Moslems. However, the German offensive on the Western Front meant that Allenby received no reinforcements until August, when he was joined by new troops from India, South Africa, Australia and New Zealand. Operations resumed, and in September the Ottoman line was broken at the Battle of Megiddo. Allied cavalry passed through and blocked the Turkish retreat, and then advanced at speed, encountering very little resistence. Turkey surrendered on 30 October.
Along with these two campaigns, there was a third, the Arab Revolt.PICTURE 26: SHARIF HUSAYN OF MECCA - In 1915, Husayn bin ‘Ali, the Sharif of Mecca and Hashemite ruler of the Hijaz Arabs, called for an Arab revolt against the Ottoman Empire. In 1916 the British came to an agreement with the Sharif, by which they would help each other to defeat the Turks. PICTURE 27: EMIR FEISAL - As a military leader, however, they preferred Emir Feisal, the Sharif’s third son. PICTURE 28: FEISAL AND T.E. LAWRENCE - The British liaison officer was a former archeologist, T.E. Lawrence. He had been working for British Military Intelligence in Cairo, but his knowledge of both the Arab people and the language made him ideal for the task. During the war he fought with the Arab guerrilla forces against the Turks, but his main achievement was to convince the Arabs to co-ordinate their efforts with those of the British. The British provided a great deal of gold to the Sharif to pay the tribesmen to continue fighting, but they also promised Arab independence. Yet, when after the fall of Damascus, when Feisal presented himself and the government he had chosen to Allenby, the general told him that the city was to belong not to the Arabs, but to the French.
Quite frankly, the British had promised the same territory to two different nations, in both cases to satisfy allies. In 1916, the British Commissioner in Egypt, Sir Henry McMahon, had promised the Arab leadership post-war independence for the Ottoman Arab provinces. PICTURES 29: MAP OF SYKES-PICOT AGREEMENT - However, the same year saw the signing of the Sykes-Picot Agreement with France. This agreement essentially split the Middle East into spheres of influence: the dark blue zone was to be under direct French control, and the light blue ‘A’ zone under French influence - and as you can see, this included Damascus; the light pink ‘B’ zone, which included Jordan, was to be under British influence, whilst the red zone, which included Iraq and Kuwait, was to be under direct British control. In other words, Syria and the Lebanon wee to go to France, Iraq, Kuwait and the Trans-Jordan to Great Britain. You’ll also notice that there was an international zone, the future Palestine. PICTURE 30: MAP OF THE MIDDLE EAST TODAY - You might like to compare the Sykes-Picot agreement map with a map of the Middle East today.
There was a third complicating factor, and this was the Balfour Declaration letter. PICTURE 31: LORD BALFOUR - Lord Balfour was the British Foreign Secretary. In a letter dated 2 November 1917 to Lord Rothschild, he declared that the British Government ‘view with favour the establishment in Palestine of a national home for the Jewish people’ without prejudice to the ‘civil and religious rights of the non-Jewish communities.’ The idea of sponsoring a home somewhere for the Jewish diaspora had been around in a vague form since the mid-19th century, but there were other motives: strategic calculations, and a pressing need to detach world Jewry from what the British saw as their predominant support for Germany, along with the fear that the Germans were contemplating some sort of analogous announcement themselves. There is no mention of political rights for either nation. Indeed, a different Semitic people formed 90% of the population of Palestine. The problems arose when it became clear that the aim of the Zionists was not only for a Jewish home, but for a Jewish state, which had not been part of the British plan.
There is another, and less-known, aspect of the origins of the Declaration, as retailed by Prime Minister David Lloyd George in his Memoirs. By 1915 there was an increasingly serious acetone problem. Acetone was an essential element in the manufacture of cordite, the smokeless powder used as propellant in small arms ammunition and shells, and acetone was in increasingly short supply. As Chairman of the Munitions of War Committee, he was ‘casting about for some solution of the difficulty.’PICTURE 32: CHAIM WEIZMANN - A mutual friend introduced him to Dr Chaim Weizmann, then a professor of chemistry at the University of Manchester, who eventually came up with a method of producing acetone through bacterial fermentation of maize starch. When maize ran short, horse chestnuts were substituted, and the schoolchildren of Britain were sent out to collect the chestnuts. Lloyd George told Weizmann that he wanted to recommend him for some great honour - such as a peerage? - but Weizmann, an ardent Zionist, told him that he wanted nothing for himself, but that he wanted Lloyd George to do something for his people. Lloyd George introduced Weizmann to Balfour, and ‘after long examination’, the result was the Declaration. This was to cause untold trouble for the British Government. As for Weizmann, in 1948, he became the first president of the new state of Israel.
At the 1920 San Remo Conference, the main subject was the disposition of the now defunct Ottoman Empire. Colonialism was now out of fashion, not least because President Woodrow would not agree to it. Instead, all such problems were to be the concern of the new League of Nations. The outcome was the concept of League mandates, the expectation of which was that the so-called mandates would thrive under the guidance of the mandatory powers, who would encourage them towards eventual independence. PICTURE 33: THE MIDDLE EASTERN MANDATES - Referring to the previous map of the Sykes-Picot Agreement, the outcome was rather different in amount of territory. However, France did indeed receive the mandates of Syria and the Lebanon and Great Britain those of Mesopotamia or Iraq and Palestine. PICTURE 34: ARAB RIOT IN 1921 - The following two years saw unrest and even riots, and in 1922 adjustments were made. To make it up to Emir Feisal for having broken their undertaking to support Arab independence, he was made the King of Iraq, and his brother Abdullah was entrusted with the ‘government of the vacant lot which the British christened the Amirate of Transjordan’. [ Monroe ]
Britain’s basic problem in the interwar period, as during the First World War itself, was how to combine two barely compatible aims: to maintain the security of her Imperial communications and oil supplies whilst showing enough sympathy with nationalist aspiration that the Arabs would not be alienated. This was difficult. The interwar years witnessed a slew of problems for the British, most of them stimulated by nationalism - and in Palestine by competing nationalisms. First of all, Iraq. The internal and external insecurity of his regime obliged King Feisal to collaborate with the British. Governed as it was (under British supervision) by a Sunni Arab clique primarily in its own interests, and by constantly changing governments, the Mandates Commission was sceptical of British assurances that Iraq was ready as a self-governing country for admission to the League of Nations. They finally accepted these assurances in 1932, and Britain relinquished her mandate. However, she retained her strategic assets and some of her advistory power, as well as control of the oilfields in the north, which had come on stream in 1928. In Jordan, the Emir’s dependent relationship with Britain, less challenged by internal unrest, was formalised by treaty in 1928.
In Egypt, there was constant rivalry between the King and the politicians of the nationalist party, the Wafd, and the British attempted to exploit this rivalry in order to negotiate a treaty less offensive to the Egyptians than the current state of affairs. However, this was not achieved until 1936, and the catalyst was Mussolini’s conquest of Abyssinia; furthermore, Mussolini was already master of the other neighbour, Libya. The Wafdist government was, therefore, willing to accept the concentration of British troops in the Canal zone in exchange for their withdrawal from the cities and elsewhere; it was also agreed to put aside for a time the vexed question of Anglo-Egyptian Sudan: did it belong by rights to Egypt, or was it part of the Empire? These compromise arrangements allowed the admission of Egypt to the League of Nations.
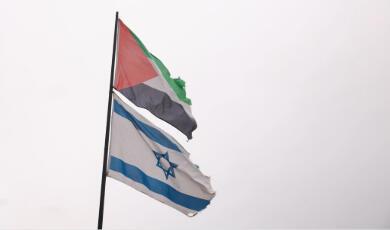
And then there was Palestine, for the entire interwar period a boil on the neck of Britain. Britain tried to promote a joint Arab-Jewish state, but this was supported by very few in the mandate itself. On the contrary, there was a steadily worsening confrontation between the two communities. Palestinian hostility both to the Zionists and to the Mandate itself increased with the increasingly less concealed determination of the Zionists to establish a state of their own. Britain’s attempts to limit Jewish immigration proved increasingly difficult to enforce, especially after Hitler made his views about Jews undeniably clear in 1933. PICTURE 35: 1936 PALESTINIAN UPRISING - In 1936, the Palestinians broke into open revolt, of which this rather fuzzy photograph is an illustration. The following year, the Peel Commission reached the somewhat reluctant conclusion that partition was the only answer, although this would require a mass transfer of the Palestinians. This report stimulated a furthr two years’ revolt, by which time the Jews numbered one-third of the population. The Zionists themselves rejected the proposed partition as insufficiently favourable to themselves, although they welcomed the idea of a mass transfer of the Arabs away from their own centres of concern. As war with Germany loomed, Britain was anxious to retain, or acquire, the maximum possible of Arab goodwill, and she made her final attempt to set out a solution with the 1939 White Paper. It emphasised that since the British had not intended that the result of the Declaration would be a Jewish state with a Jewish majority, declaring ‘categorically that it was no part of Britain’s policy that Palestine should become a Jeewish State’, Jewish immigration would be severly restricted: enough Jews had already immigrated to constitute a renewed Jewish community in Palestine, and any further immigration would unfairly prejudice Arab interests in the region. It also limited the amount of land in Palestine that could be purchased by Jews; the argument was that this was intended to aid Arab farmers by keeping the Arab economy from collapse.
PICTURE 36: JEWISH PROTESTS - there were massive Jewish protests, but in spite of opposition in Palestine and elsewhere, this remained British policy until 1947.
World War II ended with Britain apparently still dominant in the Middle East, Cyrenaica and Tripolitania having been added in 1943 to the other captured ex-Italian colonies, Somalia and Eritrea, as part of Britain’s informal empire. But over the succeeding decade or so, she suffered one defeat and loss after another. First of all came Palestine. PICTURE 37: ERNEST BEVIN - Ernest Bevin, the Foreign Secretary, tried heroically to resolve the conflicting tangle of rights, which was exacerbated by the Holocaust, sticking stubbornly to the concept of a joint Arab-Jewish state, but his efforts were doomed to failure. He outraged the Zionists, who had declared at their Biltmore Conference in 1942 their determination to secure the whole of Palestine for a Jewish state. Extremists then turned to violence. PICTURE 38: LORD MOYNE - During 1944, the Stern Gang had killed many members of the police force, ambushed the British High Commissioner, although without success, and murdered the British Minister of State in Cairo, Lord Moyne, who was shot at point blank range.PICTURE 39: KING DAVID HOTEL - On 22 July 1946, the Irgun, led by Menachem Begin, blew up the King David Hotel, site of the British military command and the British Criminal Investigation Division. Begin had apparently stressed his desire to avoid civilian casualities, and calls were made to warn the British so that they would evacuate the hotel before it was blown up, but the calls were ignored. The toll was ninty-one killed and forty-five injured, including fifteen Jews. Palestinian hostility was as unrelenting.
PICTURE 40: PRESIDENT TRUMAN - Bevin sought Washington’s help in reaching a solution, and a Joint Committee of Enquiry recommended in April 1946 the immediate admission of 100,000 Jews, balanced by acceptance of a bi-national state. President Truman publicly endorsed the former, but showed no interest in the latter. By February 1947, Bevin had given up, and referred the problem to the United Nations. In November 1947, under US pressure, the General ASsembly voted for partition. Great Britain refused to undertake its enforcement along, and in May 1948 she resigned the Mandate. PICTURE 41: ISRAELI CELEBRATIONS AFTER THE DEPARTURE OF GREAT BRITAIN - The state of Israel was declared, it was recognised within minutes by the US, and shortly thereafter the first Arab-Israeli War began.
Britain’s interest in Iran was almost entirely oil, and the predominant producer was the Anglo-Iranian Oil Company. It acted in an appallingly stupid manner, refusing to concede any of its interests, even when the Arabian-American Oil Company agreed a fifty-fifty royaltries split with Saudi Arabia. PICTURE 42: DR MUSADDIQ - In 1951, the populist leader, Dr Musaddiq, nationalised the Anglo-Iranian. PICTURE 43: HERBERT MORRISON - Bevin’s successor as Foreign Secretary, Herbert Morrison, after much agonising, decided against intervention. Instead, the vast oil installation at Abadan was closed down and British staff evacuated. The hope was this would bring him to his senses, but he refused to budge. His mistake was not realising that without the help of the company, no Persial oil would make it to market. He also hoped that help would come from neighbouring Arab countries, but he underestimated their delight in moving into the gap in the oil market. As the months wore on, the US joined Britain in fearing that he would call in Soviet help, and in due course a joint CIA/MI6 operation removed Musaddiq, and Rez Shah was restored to power. Iran now became something of an American client state. However, one outcome was that the Anglo-Iranian was forced to be more generous in sharing its concession with American companies.
And now for the final and most cataclysmic end of Empire in the Middle East: the Suez débâcle. Egyptian nationalists had watched with admiration Musaddiq’s revolution and his cavalier treatment of Britain’s oil interests.PICTURE 44: KING FAROUK - The British government, only too aware that the number of troops in Suez vastly exceeded the number allowed under the 1936 treaty, made yet another attempt to come to an agreement with King Farouk and his régime. To the Egyptians, it merely covered up continuing occupation, and on 11 November 1951, Farouk repudiated the 1936 treaty, at which crowds ran amok, attacking anything British. In July 1952, a group of middle-ranking and middle-class officers took over in a bloodless coup, ousting Farouk.
As for Suez, an agreement was finally reached in October 1954, by which British evacuation would be completed within twenty months, subject to rights of re-entry in the event of an attack on any Middle East country. In these negotiations, the US grew impatient with Britain’s reluctance to make concessions: for the Americans, containment of the Soviet Union was their utmost concern, PICTURE 45: GAMAL ABDUL NASSER - and they hoped that the goodwill of Egypt might be secured by the careful handling of her new leader, Gamal Abdul Nasser. For many Britons, the loss of Suez was a huge blow.
The Suez crisis had manifolds complications. Fundamental to it was Anglo-American conflict. For one thing, they had differing defence strategies.PICTURE 46: JOHN FOSTER DULLES - The American Secretary of State, aware that the Suez base was becoming untenable in the face of Egyptian hostility, mooted a ‘northern tier’ defence of the Middle East against Soviet aggression. PICTURE 47: ANTHONY EDEN - Eden took up the idea, and the defensive alliance signed in February 1955 between Turkey and Iraq was joined by Britain, and later by Iran and Pakistan. Nasser was furious at the development. Although Dulles supported the Pact, he refused to join it. Nasser decided to teach the Western powers a lesson, and turned to the Soviet bloc for weapons which the West had denied him. Swallowing their own anger over the Czech arms deal, which they read as a sign that he was joining the Communist orbit, the US and Britain decided to offer him funding for his Aswan Dam project. Divergencies developed between the two allies as how to deal with Nasser, but in July 1956 their shared suspicions of him and his delayed response to the dam offer led them jointly to declare that the offer was cancelled. PICTURE 48: NATIONALISATION - Nasser’s response on 26 July was to nationalise the Suez Canal.
The question was, what to do about it? Their differing responses opened a huge breach between the US and the UK. The US wanted a peaceful solution. A conference was held in London, with no effect. In early September Dulles proposed a Suez Canal Users’ Association, but little immediately came from it. PICTURE 49: DULLES AND EISENHOWER - Dulles engaged in verbal gymnastics, but Eisenhower time and again emphasised that the US would not support the use of force. Eden did not believe him. On 10 August the Chiefs of Staff presented Operation Muskateer to the Egypt Committee of the Cabinet, and on 1 September the French hinted to the Israelis that they would like to coordinate joint action; on 22 October the tripartite plan is agreed. Israel is to attack Egypt and, on the pretence that they are separating the two sides, Britain and France are to move in and take control of Suez. PICTURE 50: HAROLD MACMILLAN - Meanwhile, Harold Macmillan, Chancellor of the Exchequer and a hawk, told Cabinet on 11 September that only force would work, while the following day, Dulles announced in Washington that ‘we do not intend to shoot our way through’.
PICTURE 51: ISRAELIS ATTACK EGYPT - Events moved in an inexorable manner, and on the 29th of October, the Israelis attacked Egypt. The following day, Britain and France sent ultimatums to the two sides, instructing them to withdraw ten miles to either side of the Canal to allow Anglo-French occupation. The Anglo-French task force set sail from Malta, there was uproar in the House of Commons, and at the UN France and Britain vetoed a US resolution calling for a ceasefire. PICTURE 52: LANDING OF BRITISH TROOPS; PICTURE 53: FRENCH TROOPS. The following day, the British and the French attacked Egyptian airfields. On 2 November, the General Assembly called for a ceasefire. On the 4th of October, Egypt blocked the Canal. The same day, Britain was warned of oil sanctions. On the 5th the Soviets threatened rockets on Paris and London. On the 6th of November, the British and the French executed seaborne landings at Port Said. PICTURE 54: PORT SAID AFTER BOMBING.
The same day it became all too clear that the condition of the pound was critical; when Macmillan telephoned Washington, he was told that only a ceasefire by midnight would secure American support for a loan from the IMF. Macmillan reported this to the Cabinet, urging that the the country faced financial disaster - oil had already been cut off, and the US was refusing to make up the shortfall. The Cabinet decided that the invasion would cease, and British troops stopped twenty-three miles down the Canal from Port Said. On the 23rd of November the Edens flew to Jamaica, from where he would not return as Prime Minister. On the 30th the Cabinet accepted that withdrawal from Egypt was inevitable, and on 22 December, the evacuation of the troops from the Canal Zone was complete. PICTURE 55: NASSER TRIUMPHANT - As this cartoon shows, Nasser and Egypt were triumphant.
What went wrong? The US opposed the whole Suez episode. They feared that Britain’s indulging in an imperial assault would only drive the Arab peoples closer to the Soviet Union, and the US feared communists. The UK, on the other hand, was defending her position, and feared nationalists. The UK’s supporters in Egypt had been found amongst the large landowners and merchants, and the royals, in other words, the élite, whilst the US beleived that the future lay in alliance, as it were, with the rising middle classes. They were entirely at odd, and the stronger power finally got its way.
Suez was a profound turning-point. The long-term result was a withdrawal from the remainder of the Empire, and a disinclination to become involved abroad. Certainly, it was now clear, the UK could not involve itself in any foreign policy which required the use of force without at least the acquiescence of the US. The US found that the fading away, for a time, of UK interest abroad could be inconvenient, and Eisenhower was later to remark that his worst foreign policy mistake had been not to support the British and French at Suez. Eden wrote a Cabinet paper recommending that the UK now turn to Europe. But in any case, it was a turn away from much of the past, and in my final lecture in June, I will describe the slow, drawing-down of the imperial blind.
© Professor Kathleen Burk, Gresham College, 22 March 2006
This event was on Wed, 22 Mar 2006

Support Gresham
Gresham College has offered an outstanding education to the public free of charge for over 400 years. Today, Gresham College plays an important role in fostering a love of learning and a greater understanding of ourselves and the world around us. Your donation will help to widen our reach and to broaden our audience, allowing more people to benefit from a high-quality education from some of the brightest minds.